null
Accessories

Accessories

A ductless mini split system is only as good as the installation around it. The unit itself may be perfectly sized and efficient, but a poorly routed line set, an under-spec'd bracket, or a missing condensate fitting can mean a callback, a warranty headache, or a safety issue. Getting the accessories right the first time is genuinely one of the lower-cost decisions in a mini split project, and HVAC365 keeps a broad selection stocked so you are not hunting down a single fitting from three different suppliers. Whether you are a homeowner replacing an aging system, a contractor spec-matching parts for a multi-zone commercial job, or a distributor stocking up for a busy season, the accessories in this category cover the supporting hardware and materials a ductless mini split install actually needs. For a full picture of the equipment itself, the broader Ductless Mini Splits lineup is the place to start.

Choosing the Right Mini Split Accessories

Accessories for ductless mini splits are not one-size-fits-all, and buying the wrong part almost always costs more to fix than to get right upfront. The choices here hinge on a few key decisions.

Line set sizing is probably the most critical call. A line set that is undersized for the system's refrigerant capacity can restrict flow, hurt efficiency, and stress the compressor. One that is oversized wastes refrigerant charge and material cost. Before ordering, pull the outdoor unit's spec sheet and confirm the exact line set diameter and maximum run length the manufacturer requires for your system. Do not assume a line set that fit your last install will fit this one; even units within the same brand family can differ.

Mounting hardware is the other area where buyers commonly underestimate what they need. A bracket that works for a compact single-zone outdoor unit may not be rated for a heavier multi-zone condenser. Check the condenser's weight and the bracket's load rating against each other. Wall type matters too: a masonry exterior wall and a wood-frame wall call for different anchor hardware, and that is usually the installer's responsibility to sort out before the bracket goes up.

Condensate management accessories, including drain line extensions, pumps, and fittings, vary depending on whether the indoor air handler can gravity-drain to an appropriate location or needs active drainage. Measure the actual run from the unit's drain port to the nearest acceptable discharge point before ordering. A situation where gravity drainage is borderline is better resolved with a condensate pump ordered in advance than with a callback after the unit is running.

For distributors or contractors buying for multiple jobs at once, line set bundles and bulk packaging may be relevant considerations alongside the installation-readiness factors covered further down. Lead time and stock consistency matter when a job schedule is firm.

Buying Tips

  • Match the line set to the manufacturer spec, not to what is on the truck. Using a line set that is close but not exactly what the manufacturer specifies can void the warranty and cause refrigerant charge issues that are hard to diagnose later. The spec sheet is the only authority here.
  • Order condensate accessories before the install day, not after. It is easy to assume gravity drainage will work until you are on site and realize the drain port exits on the wrong side or the drop is insufficient. A condensate pump is inexpensive relative to a second service call.
  • Do not skip the line set cover or chase. Exposed line sets age faster and are more vulnerable to physical damage. A line set cover adds minimal cost at install time and extends the life of the refrigerant lines significantly.
  • Verify accessory compatibility with the specific system, not just the brand. A brand may make several product families that use different refrigerants, line sizes, or electrical configurations. An accessory listed as compatible with one family may not work with another. Cross-check the model number on the unit, not just the brand name on the packaging.

If your project also involves whole-home air quality or supplemental filtration alongside the mini split install, it is worth looking at what the full accessory ecosystem covers before finalizing your order.

What Mini Split Accessories Are Actually Used For

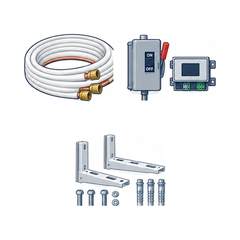
Ductless mini split accessories fall into a few practical groupings based on what part of the installation they support. Understanding which category your need falls into makes it easier to build a complete parts list before the job starts rather than discovering gaps on install day.

  • Line sets and refrigerant piping: The copper line sets connecting the indoor and outdoor units are the circulatory system of a ductless installation. They come in various diameters and pre-charged or field-charged configurations depending on the system and application. Length requirements vary by job, and the correct spec comes from the equipment documentation, not from estimation.
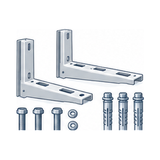
  • Mounting brackets and support hardware: These range from simple wall brackets for single-zone outdoor units to heavy-duty rack systems for larger condensers or rooftop placements. The bracket selection depends on the unit's weight, the mounting surface, and local code requirements for seismic or wind load in some regions.
  • Line set covers and chases: Aesthetic and protective covers that run over exposed refrigerant lines on the exterior of a building. These protect the line set from UV exposure, physical damage, and weather while keeping the installation looking clean.
  • Condensate management: Drain line extensions, fittings, and condensate pumps that handle the water produced by the indoor air handler during cooling operation. The right solution depends on the unit's drain port configuration and the available discharge path on site.
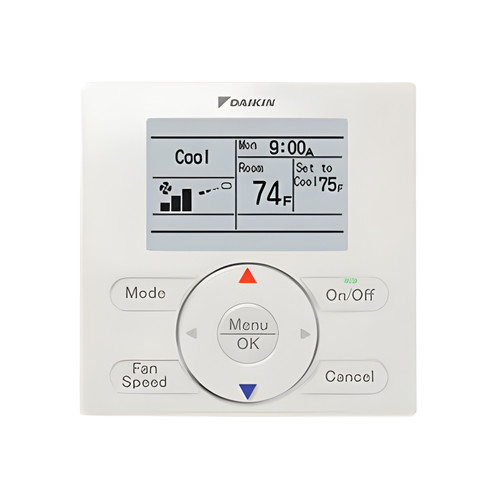
  • Electrical and communication accessories: Wire and communication cable used to connect the indoor and outdoor units and, in some systems, to connect to a wired controller or building automation interface. Gauge and cable type should be pulled from the installation manual for the specific unit.

Before You Order: Site and Spec Checks

Getting the accessories ordered correctly starts with understanding the physical and electrical realities of the installation site. There is no shortcut here; a missing measurement or an assumed spec is what drives most accessory returns and callbacks.

Start with the line set run. Measure the actual routing distance from the indoor unit to the outdoor unit, including any vertical rise or drop and any horizontal offsets. Do not measure straight-line distance; measure the path the line set will actually travel. Compare that number against the manufacturer's maximum allowable line set length and the minimum and maximum vertical separation between units. Both matter, and both are in the installation manual.

Check the electrical requirements for any powered accessory, particularly condensate pumps. Verify the voltage and amperage the accessory requires against what is available at the installation location. A condensate pump wired to the wrong circuit is both a code issue and a safety risk.

For the mounting bracket, look up the outdoor unit's actual shipping and operating weight from the spec sheet, and compare it against the bracket's rated load capacity. Also check the wall or surface the bracket will attach to. Different anchor hardware is required for concrete, brick, wood framing, and steel framing, and in some jurisdictions seismic or wind-load requirements add further constraints. Verify local code requirements before the bracket goes up.

Communication wire and line set connections need to be compatible with the specific indoor and outdoor unit pairing, not just the brand family. Multi-zone systems often use different communication protocols than single-zone systems from the same manufacturer. Pull the wiring diagram from the installation manual and match the wire type and gauge to what is specified there, not to what looks similar on the shelf.

Line set cover sizing needs to match the line set diameter plus any communication wire or drain line that will run inside the same chase. Measure the actual bundle before selecting a cover size; a cover that is too narrow forces the installer to leave something exposed.

What Buyers Ask Most About Mini Split Accessories

Q: How do I know what line set size I need?

A: The line set diameter is specified in the installation manual for your specific outdoor unit — not a universal standard across all systems. Look for the liquid line and suction line diameters as separate specs; they are typically different from each other. The sizing considerations above cover why matching the manufacturer spec exactly matters.

Q: Can I use a longer line set than the manufacturer specifies?

A: No. Exceeding the manufacturer's maximum line set length generally voids the equipment warranty and requires additional refrigerant charge beyond the factory charge, which must be calculated and added by a certified technician. If your run is close to the limit, contact the manufacturer or a qualified technician before proceeding.

Q: Do I need a condensate pump, or will gravity drainage work?

A: It depends on whether there is a clear downward slope from the drain port to an acceptable discharge point. If the discharge point is level with or above the drain port, a condensate pump is required. Measure the actual site conditions — the condensate guidance above explains what to look for before you order.

Q: What should I look for in a mounting bracket?

A: The bracket's load rating must meet or exceed the outdoor unit's operating weight from the spec sheet. Surface material, local wind and seismic requirements, and condenser clearances all factor in as well — the site check section above walks through each of those in detail.

Q: Are mini split accessories brand-specific?

A: Some are, some are not. Communication wire and control interfaces tend to be brand- or model-family-specific. Line sets and condensate components are more often generic but still need to match the specific diameter and configuration the unit requires. Always cross-check against the exact model number, not just the brand name.

Q: What communication wire do I need between the indoor and outdoor unit?

A: The wire type, gauge, and number of conductors are specified in the wiring diagram in the installation manual. These vary by system and should not be guessed. Pull the exact spec from the documentation — the site check section above covers where this fits into the pre-order process.

Q: Can I install mini split accessories myself, or do I need a licensed technician?

A: Mounting brackets, line set covers, and condensate drain lines can generally be installed by a competent DIYer following the manufacturer's instructions. Any work involving the refrigerant circuit — connecting or disconnecting line sets, charging the system — legally requires a certified HVAC technician with an EPA Section 608 certification. Electrical connections should be made by a licensed electrician in most jurisdictions.

HVAC365 ships mini split accessories nationwide, so a stalled job or a missing part does not have to mean a long wait or a local supplier search. The catalog covers the accessories a residential replacement and a commercial multi-zone install both need, and ordering in volume is straightforward for distributors or contractors working through a project pipeline. If you are not sure what accessories your specific system requires, the product documentation for your unit is the authoritative starting point, and the HVAC365 team can help you work through what is needed for a specific install.

Compare
Show: 12 24 48

Fast Shipping

Easy Returns

Warranty Coverage

Financing Available