null
Channel Drains

Channel Drains

Water that lands on a pool deck has to go somewhere. Rain, splash-out, hose-down water and runoff from the yard will run toward the lowest point, and without a plan that low point is often the pool itself, the house foundation, or a puddle that never dries and turns green. Channel drains, also called deck drains or trench drains, collect that water in a narrow slot along the deck and carry it away to a safe discharge point. On a well-built pool deck, they are nearly invisible. On a deck without them, or with clogged ones, the problems show up fast: muddy water washing into the pool, standing water, slippery algae on pavers and water against the house.

This category covers channel drains and deck drain systems for pool decks and patios, including drain channels, grates, end caps, outlets, connectors and fittings. Products come from manufacturers that make drainage for pool and hardscape work. Pool builders, deck and paver contractors and landscapers buy most of these, along with remodel crews replacing broken or clogged deck drains. Homeowners fixing a damaged section of drain or replacing broken grates shop here as well.

How Channel Drains Work

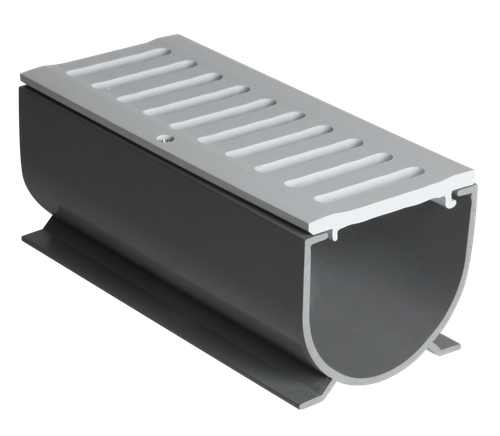
A channel drain is a long, narrow trough set into the deck surface. The deck is pitched slightly toward the drain so water runs into it. Inside the channel, water flows to an outlet, usually connected to a pipe that runs to a yard drain, dry well, storm system or other approved discharge point.

Main components:

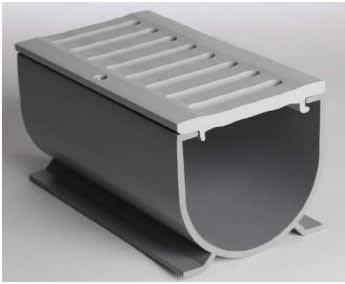
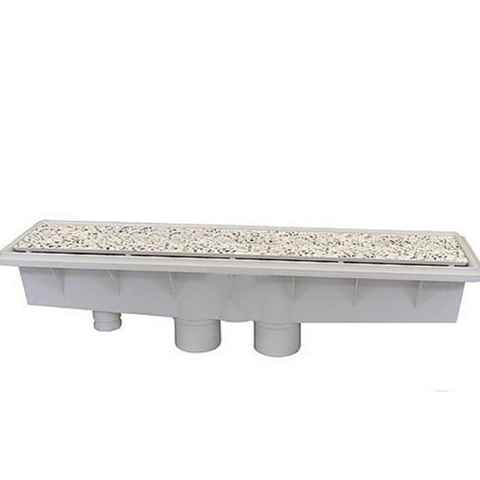
  • Channel or body. The trough itself, usually PVC, polymer or another plastic, sized by width and depth. Some deck drains are narrow, low-profile channels made to sit just below the concrete or paver surface.
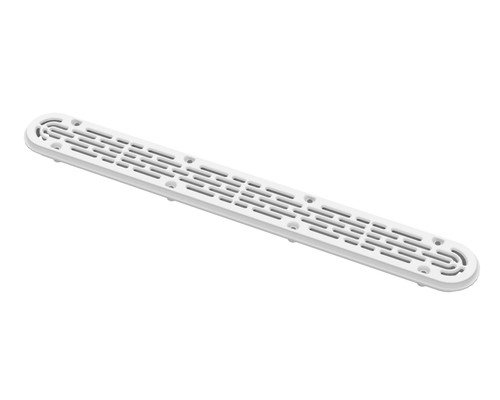
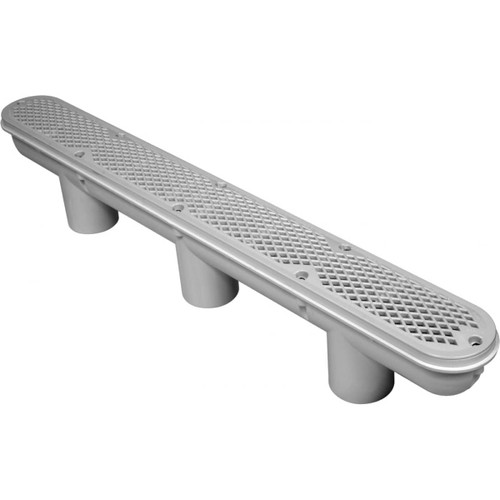
  • Grate or cover. Sits on top of the channel, keeps debris and feet out, and lets water in. Grates come in different materials, colors and opening styles, including heel-safe and barefoot-friendly patterns.
  • Outlets. Bottom or end outlets connect the channel to the drain pipe.
  • End caps and connectors. Close the ends of a run and join sections together.
  • Corners and tees. Allow the drain to follow the shape of the deck or connect multiple runs.

Deck drains are a separate system from the pool's circulation. They should never connect to the pool's suction or return lines, and they should not drain back into the pool.

Signs a Channel Drain Needs Repair or Replacement

  • Standing water on the deck. The drain may be clogged, the deck pitch may be wrong, or the outlet pipe may be blocked or collapsed.
  • Water running into the pool. Dirt, fertilizer and debris washing into the pool raise the chemical demand and can stain surfaces.
  • Cracked or broken grates. Sharp edges or missing sections are a trip and cut hazard for bare feet.
  • Channel separated from the deck. Settling or ground movement can pull the channel away from the concrete, opening gaps where water gets under the deck.
  • Clogged outlets. Leaves, sand and dirt build up in the channel and outlet pipe over time.
  • Odors or algae. Standing water in a clogged channel can grow algae and smell.
  • Faded or brittle plastic. UV exposure can make older plastic channels and grates brittle.

How to Choose the Right Channel Drain

  1. Measure the existing drain. For replacements, measure the channel width, depth, length and grate size. Note the brand if it is marked.
  2. Width and capacity. Wider and deeper channels carry more water. Size based on the deck area draining to it and local rainfall.
  3. Grate style. Pick a grate that is comfortable for bare feet and sturdy enough for foot traffic. Choose a color that suits the deck finish.
  4. Deck material. Channel drains for poured concrete may differ from those made for pavers or stone. Check installation requirements for your deck type.
  5. Outlet size and position. Match the outlet to the drain pipe size and location. Common outlet sizes include 2, 3 and 4 inch connections, depending on the system.
  6. Fittings needed. Count end caps, corners, tees and connectors. A drain run that turns corners needs the right fittings.
  7. Discharge plan. Plan where the water will go: yard drain, dry well, storm drain or approved discharge point. Follow local rules.
SpecWhat It AffectsHow to Choose
Channel widthHow much water it collectsLarger deck areas and heavy rain need wider channels
Channel depthFlow capacityDeeper channels carry more water
Grate typeComfort, safety and lookHeel-safe, barefoot-friendly and matching color
MaterialDurability and UV resistanceUV-stable plastic or polymer for outdoor use
Outlet sizeConnection to drain pipeMatch existing pipe or planned drain line
FittingsLayout and connectionsEnd caps, corners, tees and connectors as needed

Planning a Deck Drain Layout

On new construction or a full deck replacement, the drain layout is worth sketching before any forms go up. A few practical rules from builders who do this every week:

  • Pitch away from the pool. The deck near the coping usually pitches away from the water, toward a drain line set back from the pool edge, so dirty runoff never reaches the pool.
  • Catch water before it hits the house. If the deck runs up to the home, a drain line between the deck and the foundation keeps water off the slab.
  • Keep runs reasonable. Very long runs to a single outlet can back up in heavy rain. Add outlets along the run where needed.
  • Plan for cleanouts. Removable grates and accessible outlets make annual cleaning much easier.

Installation and Safety Tips

  • Get the deck pitch right. The deck should slope toward the drain. Even the best drain won't help if water can't reach it.
  • Keep the drain separate from the pool system. Never tie deck drains into pool plumbing.
  • Protect the channel during the pour. Keep concrete out of the channel and outlet by taping or covering it until the pour is finished.
  • Set the grate flush. Grates should sit flush or very slightly below the deck surface to avoid tripping.
  • Use the right glue and fittings. Use PVC primer and cement or the manufacturer's recommended connectors for joints.
  • Follow local discharge rules. Some areas restrict where deck water and pool water can go. Check before tying into storm drains.
  • Clean regularly. Remove grates and flush the channel at least once a year, or more in heavy leaf areas.
  • Bonding. Metal grates or drains near the pool may fall under NEC Article 680 bonding requirements. Most channel drains are plastic, but confirm with a licensed electrician or qualified pool professional if metal is involved.

Shopping This Category at HVAC365

All channel drains, grates and fittings in this category are brand-new with the full manufacturer warranty, and product pages list widths, depths, lengths and outlet sizes so you can plan a run or match a replacement. Most items ship in 1-2 business days. If you are matching an existing drain, send HVAC365 measurements and photos and we can help find a fit.

Frequently Asked Questions

Can I replace just the grate on my channel drain?

Often yes. Measure the grate width and length and check the brand if possible. Many grates are sold separately.

Where should deck drain water go?

To a yard drain, dry well, storm drain or other approved discharge point, never back into the pool. Check local rules about discharge.

Why does my deck still flood with a channel drain?

The drain may be clogged, the outlet pipe may be blocked, the deck may not pitch toward the drain, or the drain may be undersized for the area.

Can channel drains be installed in a paver deck?

Yes. Some channels are designed for pavers. Follow the manufacturer's instructions for setting them in sand or concrete.

How often should channel drains be cleaned?

At least once a year. In areas with heavy leaves, sand or dirt, clean them more often.

Are channel drains required around pools?

Requirements depend on local code and the deck design. Many builders install them as standard practice to protect the pool, deck and house.

Compare
Show: 12 24 48

Fast Shipping

Easy Returns

Warranty Coverage

Financing Available