
-
EZ Plenum
EZ Plenum 4 Inch Roof Vent with Collar, Backdraft Damper & Removable Screen, Extra Tall, 26 Ga Galvanized | EZRVCD4
SKU: EZRVCD4
$136.94- 📦$19.95 Flat-Rate Shipping
- ⚡Fast Shipping
Ships from MFG in 3-5 Business Days70 in stock -
EZ Plenum
EZ Plenum 6 Inch Roof Vent with Collar, Backdraft Damper & Removable Screen, Extra Tall, 26 Ga Galvanized | EZRVCD6
SKU: EZRVCD6
$150.96- 🚚Qualifies for FREE Shipping
- ⚡Fast Shipping
Ships from MFG in 3-5 Business Days70 in stock -
EZ Plenum
EZ Plenum 10 Inch Roof Vent with Collar, Backdraft Damper & Removable Screen, Extra Tall, 26 Ga Galvanized | EZRVCD10
SKU: EZRVCD10
$189.19- 🚚Qualifies for FREE Shipping
- ⚡Fast Shipping
Ships from MFG in 3-5 Business Days70 in stock -
EZ Plenum
EZ Plenum 8 Inch Roof Vent with Collar, Backdraft Damper & Removable Screen, Extra Tall, 26 Ga Galvanized | EZRVCD8
SKU: EZRVCD8
$168.37- 🚚Qualifies for FREE Shipping
- ⚡Fast Shipping
Ships from MFG in 3-5 Business Days70 in stock -
EZ Plenum
EZ Plenum 4 Inch Side Wall Cap with Swivel Lock Backdraft Damper & Removable Screen, 26 Ga Galvanized | EZSWC4
SKU: EZSWC4
$89.94- 📦$14.95 Flat-Rate Shipping
- ⚡Fast Shipping
Ships from MFG in 3-5 Business Days70 in stock -
EZ Plenum
EZ Plenum 8 Inch Side Wall Cap with Swivel Lock Backdraft Damper & Removable Screen, 26 Ga Galvanized | EZSWC8
SKU: EZSWC8
$103.23- 📦$19.95 Flat-Rate Shipping
- ⚡Fast Shipping
Ships from MFG in 3-5 Business Days70 in stock -
EZ Plenum
EZ Plenum 6 Inch Side Wall Cap with Swivel Lock Backdraft Damper & Removable Screen, 26 Ga Galvanized | EZSWC6
SKU: EZSWC6
$96.62- 📦$14.95 Flat-Rate Shipping
- ⚡Fast Shipping
Ships from MFG in 3-5 Business Days70 in stock -
EZ Plenum
EZ Plenum 10 Inch Side Wall Cap with Swivel Lock Backdraft Damper & Removable Screen, 26 Ga Galvanized | EZSWC10
SKU: EZSWC10
$111.42- 📦$19.95 Flat-Rate Shipping
- ⚡Fast Shipping
Ships from MFG in 3-5 Business Days70 in stock -
EZ Plenum
EZ Plenum 12 Inch Side Wall Cap with Swivel Lock Backdraft Damper & Removable Screen, 26 Ga Galvanized | EZSWC12
SKU: EZSWC12
$118.99- 📦$19.95 Flat-Rate Shipping
- ⚡Fast Shipping
Ships from MFG in 3-5 Business Days70 in stock -
$32.40
- 📦$9.95 Flat-Rate Shipping
- ⚡Fast Shipping
Ships in 3-4 Business Days10 in stock -
$43.48
- 📦$9.95 Flat-Rate Shipping
- ⚡Fast Shipping
Ships in 3-4 Business Days10 in stock -
$39.29
- 📦$9.95 Flat-Rate Shipping
- ⚡Fast Shipping
Ships in 1-2 Business Days10 in stock
Buying guidance
Wall Caps & Roof Vents



Wall Caps and Roof Vents: A Practical Buying Guide
Every exhaust fan, range hood, fresh-air intake and many vented heaters end at the outside of the building, and the part that finishes that opening matters more than most people think. A good wall cap or roof vent lets air out (or in) freely, keeps rain, wind, birds and pests out, and stops outside air from blowing back down the duct when the fan is off. This guide explains the types, how to size them, what to look for in materials and dampers, and how to pick the right finish.
What a wall cap or roof vent does
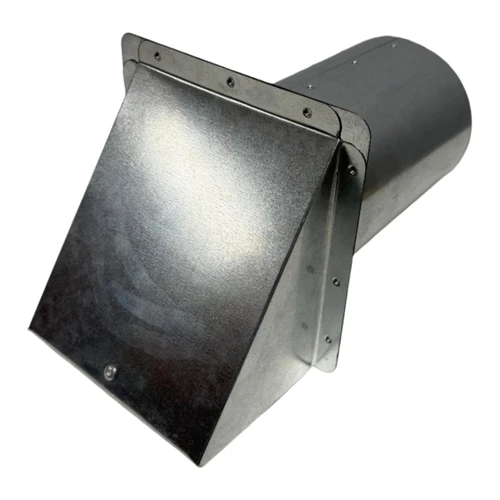
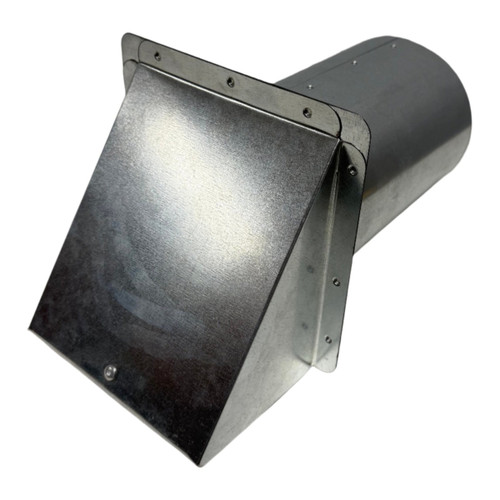
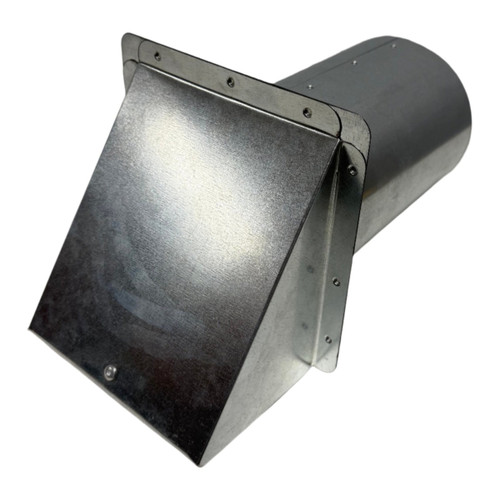
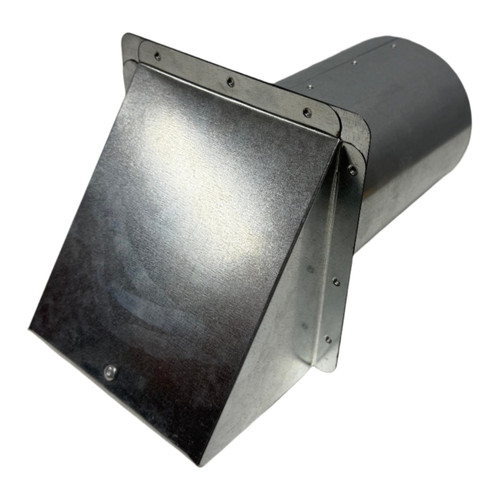
A wall cap or roof vent is the termination of a duct. Inside the building the duct carries exhaust air from a bath fan, kitchen hood or ventilation fan, or brings fresh air in for an intake. At the outside wall or roof the duct needs a hood that sheds water, a screen that keeps critters out and, in most cases, a backdraft damper that opens when air moves out and closes when it stops. Without that damper, cold or humid outside air drifts back into the duct, which wastes energy and can cause condensation and odors.
Types of terminations
Side wall caps
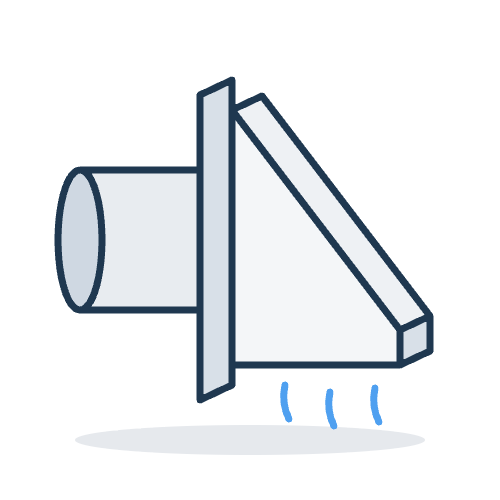
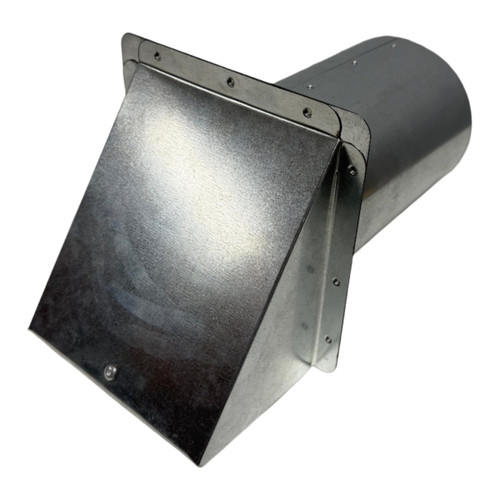
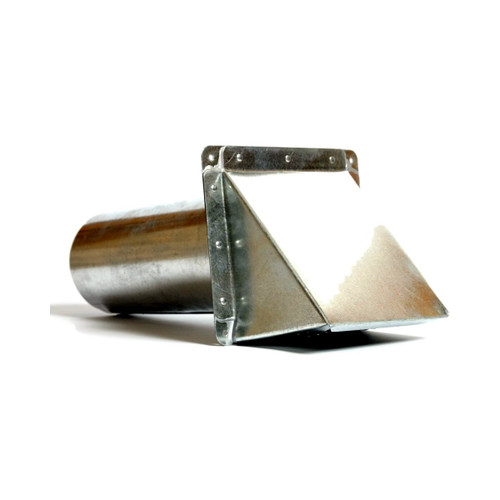
Side wall caps mount on an exterior wall. A round tube passes through the wall and connects to the duct, a flat flange covers the hole on the outside, and an angled hood points downward so rain runs off. Side wall caps are the most common termination for bath fans, range hoods, dryer-style exhaust runs and fresh-air intakes. Some designs, like the EZ Plenum side wall cap with its swivel lock damper, can be set up for either exhaust or intake, so one part covers both jobs.
Roof vents
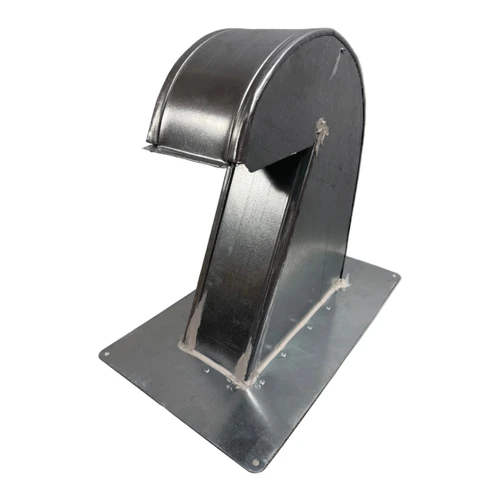
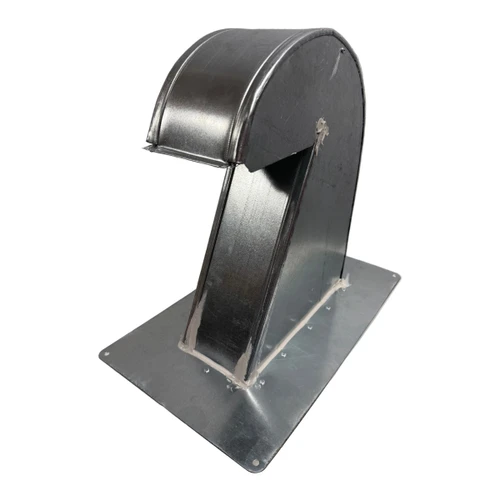
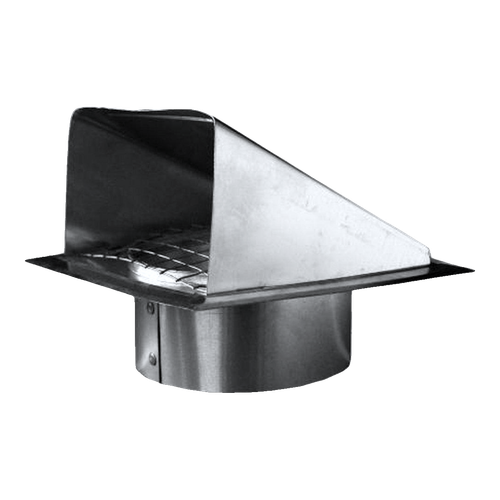
Roof vents terminate a duct through the roof. A flanged base sits on the roof deck and is flashed in with the roofing, a collar connects to the duct below, and a tall hood keeps rain from falling straight into the opening. Extra-tall profiles lift the opening higher above the roof surface, which helps where water or debris can build up. Look for a backdraft damper and a removable screen, the same features you want on a wall cap.
Heater vent and combustion air terminations
Gas heaters and some other appliances use dedicated vent caps and combustion air terminations designed by the appliance manufacturer. These are not interchangeable with general-purpose exhaust caps. Always use the vent and termination parts the appliance manufacturer lists in its installation manual, and install them as that manual describes.
Choosing between a wall cap and a roof vent
The choice usually comes down to where the fan is and how the duct can run. A bath fan or range hood near an outside wall is easiest to vent with a short horizontal run to a side wall cap. Fans in the middle of the house, under an attic, often vent more directly straight up through the roof. Shorter, straighter runs move more air and collect less moisture, so pick the termination that gives you the simplest path.
Climate matters too. In places with heavy snow, a wall cap can get buried, so a roof vent with an extra-tall profile may be the better choice. In hot, humid regions, a long run through an unconditioned attic can collect condensation, so a short run to a wall cap may work better. On multifamily and commercial buildings, the location of the termination is often set by the architect and the local code, so check the plans before you order.
Appearance is the last piece. Wall caps are visible from the street on many homes, while roof vents are often hidden from view. Where a cap will be seen, a painted finish that matches the siding or trim keeps it from standing out.
Sizing a wall cap or roof vent
Match the cap to the duct. A 4 inch bath fan duct needs a 4 inch cap, a 6 inch range hood duct a 6 inch cap, and so on. Going smaller than the duct restricts airflow and makes the fan louder and less effective. Check these numbers before you order:
- Duct or collar diameter: the round size that connects to your duct. Some roof vents use a collar that differs from the nominal vent size, so read the spec sheet.
- Tube length: on wall caps, make sure the tube is long enough to pass through the wall thickness and reach the duct connection.
- Hood size: the width and depth of the hood, useful when spacing caps on a wall or near windows and trim.
- Base and flange: on roof vents, the base size determines how much flashing surface you have.
- Free area: the open area of the vent, a useful number when comparing vents for airflow.
Backdraft dampers and screens
A backdraft damper is a hinged flap that opens with outgoing air and falls closed when the fan stops. It keeps outside air, insects and odors out of the duct. Make sure the damper on the cap matches the airflow direction you need: exhaust caps open outward, intake caps open inward. Caps with a reversible or swivel damper can be set either way, which helps when one model has to serve both purposes.
A removable screen keeps birds, rodents and large insects out of the duct. It should come off for cleaning, because lint and grease build up over time and reduce airflow. Kitchen and dryer-style exhaust in particular should be checked and cleaned regularly.
Materials and finishes
Galvanized steel is the standard material for wall caps and roof vents. It is strong, it holds its shape and its zinc coating resists corrosion. Heavier gauges and G-90 galvanized coatings stand up better to weather. Aluminum is lighter and naturally corrosion resistant, and stainless steel is the choice for coastal and harsh environments.
Mill finish (bare galvanized) is the most economical, but it stands out against painted siding, stucco and trim. Painted finishes such as white, black, brown, bronze, copper and green let the cap blend into the building. On visible walls and roofs, a matching color makes a noticeable difference to the finished look.
Installation tips
- Size the cap to the duct and keep the duct run as short and straight as practical.
- Slope horizontal ducts slightly toward the outside so condensation drains out rather than back toward the fan.
- Seal the flange to the wall or flash the roof vent into the roofing so water cannot get behind it.
- Fasten the duct to the cap collar and seal the joint.
- Keep exhaust terminations away from windows, doors and fresh-air intakes, and follow the clearances in your local building code and the fan or appliance instructions.
- Check the damper moves freely after installation.
Related parts
Wall caps and roof vents finish the run that starts at a bath fan, range hood, ventilation fan or fresh-air intake. You may also need rigid or flexible duct, duct collars and fittings, and mounting hardware. HVAC365 carries these alongside the caps in the Ventilation and Air Distribution sections.
Frequently asked questions
Can one wall cap be used for both intake and exhaust?
Standard caps are made for one direction. Caps with a reversible or swivel lock damper, such as the EZ Plenum EZSWC series, can be set up for either.
What size wall cap do I need?
The same size as your duct. A 4 inch duct takes a 4 inch cap, a 6 inch duct a 6 inch cap.
Do roof vents leak?
A properly flashed and sealed roof vent sheds normal rain. Extreme wind-driven rain and severe storms can still challenge any roof penetration, so flashing and sealing matter.
Why does my wall cap need a damper?
The damper closes when the fan is off, keeping outside air, insects and odors from coming back down the duct.
Can I use a regular wall cap to vent a gas heater?
No. Use only the vent and termination parts the heater manufacturer specifies.
Which finish should I choose?
Mill finish is the most economical. Painted finishes cost a little more and blend the cap into the wall or roof.


